This is default featured slide 1 title

Go to Blogger edit html and find these sentences.Now replace these sentences with your own descriptions.

This is default featured slide 2 title

Go to Blogger edit html and find these sentences.Now replace these sentences with your own descriptions.

This is default featured slide 3 title

Go to Blogger edit html and find these sentences.Now replace these sentences with your own descriptions.

This is default featured slide 4 title

Go to Blogger edit html and find these sentences.Now replace these sentences with your own descriptions.

This is default featured slide 5 title

Go to Blogger edit html and find these sentences.Now replace these sentences with your own descriptions.

Don`t Learn to HACK - Hack to LEARN.All about Ethical Hacking, Penetration Testing & Computer Security

Showing posts with label Useful Articles. Show all posts

Monday, September 10, 2012

How To Automatically Log Out From Facebook After Certain Time

I know its happen to many people , suppose you are chatting with your friends in Facebook then you got a phone on somebody came in your door , you just leave your PC without log out from Facebook and you forget that you were chatting with your friends in Facebook.On the opposite site your friend become angry that you are not replying.If you have face this kind stuff then best is automatically log off from Facebook after a certain or fixed time if you forget to log out.So try this awesome trick
Step 1:Download and install this Firefox add on Click Here"
Step 2:Default time to auto log out is 60 second , just change it just opening the add on by clicking Firefox in the top left, then Add-ons, then Options .


Hollo.....How To Play Game In 3D In Normal PC

How To Play Game In 3D in nomal PC,If you are a gamer like me then you should try this.As Now you can play a game in 3D.To do this just download and install a software TriDef.Its not about fully 3D but you can try this for experience.
To Download Click Here
To know Supported Game List See Here

How To upgrade from Windows 8 Consumer Preview to Windows 8 Release Preview


Step 1.Put the Windows 8 Release Preview DVD and Double click on CD drive From your Windows 8 Consumer Preview , don't need to boot the Windows 8 Release Preview DVD
Step 2.You will get In Dialog box and click on continue to install
Step 3.Follow the step like other installation.

Now your Windows 8 Release Preview is installed in C drive and the whole file of Windows 8 Consumer Preview is in Windows.old folder.


Friday, September 7, 2012

Download Documents As a Premium User From Scribd.Com

Download Documents As a Premium User From Scribd.Com
Hi all users, it a common that we all do search most of our documents online and scribd.com is the biggest source of finding it here you can get most of you documents you looking for. So first of all we need to know what this site is all about -  "scribd.com is a document-sharing website that allows users to post documents of various formats, and embed them into a web page using its iPaper format."
But unfortunately it is also doing a bunisess and want to make revenuse from it, user have to become it's premium user in order to download the document. But what if you don't have that time ? so today we're going to teach you to download any document as a premium user, without paying a penny. So lets get started.

1. First of all go to scribd.com and  to note down the "Document's Unique ID".
2. Then install the User Agent Switcher (a  afirefox add-on) .
3. After installing the add-on, you need to change the user agent setting Interner Explorer 6 from the Tools menu as show below.
 
4. Now the Scribd's mobile version by clicking here
5. Here you can find our document, by doing a search via "Document's Unique ID".
6. Mobile's analog of your document's page will appear with the "Download Now" button, but if you click this button, you will be redirected to the original page of the documente. So, before clicking the  "Download Now" button, we have to change the user agent again to I-Phone 3.0
7. Now finally click that button (Download Now) and the download will start immediately.
Through IDM we can resume downloads by refreshing download address.This trick works on almost all documents. No need to have premium account or uplaoding/downloading any documents.
Posted by - Karthick Shiva
Enjoy.......

Tuesday, August 14, 2012

Get/Resolve Any Website's IP Protected by CloudFlare

find Any Website's IP Protected by CloudFlare
Hi all users, I have noticed couple people asking how to find a site's real IP when the site is covered/protected By CloudFlare. As you may notice now a days many booters, hosts, malicious websites, and more use CloudFlare for DDoS Protection & Anti-Abuse Report Protection. With CloudFlare protection, it is difficult to get the hosts IP; therefore, it is difficult to send an abuse report or launch a (D)DoS attack. This simple toll will help you obtain any website protected by CloudFlare's real IP, which can be used for whatever you desire! Have fun :)

Well I found this tool and checked and finally came to know that it will do the job, it uses a PHP script which is actually coded by 'orgy'. This tool is very easy to use you just download it and enter the URL of desire site and in the matter of the seconds you will get the real IP address of that site.

Screen :
 
Downlaod here
Enjoy.......
Credit : Orgy

Tuesday, July 24, 2012

Fix ----- Windows Installer has stopped working


Apparently there’s a bug in Microsoft’s Customer Experience Improvement Program that’s causing msiexec to crash.
It can be fixed by turning off Customer Experience Improvement Program or by editing the registry.
From first method:
1. Delete the string values (Except for (Default)) in HKLM\Software\Microsoft\SQMClient\Windows\DisabledSessions
2. Start gpedit.msc
3. Expand Computer Configuration, expand Administrative Templates, expand System, expand Internet Communication Management, and then click Internet Communication settings.
4. In the details pane, double-click Turn off Windows Customer Experience Improvement Program, and then click Enabled.

Play PS2 games on your PC

Play PS2 games on computer – PCSX2 emulator Configuration BIOS
First download Play PCSX2 from Download

 and Install It.
Now download BIOS configuration for PCSX2
http://adf.ly/7Rn0U
Extract and copy to ‘bios’ under your PCSX2 installation folder
You also need Magic ISO to load your ISO files of PS2.
Download Magic Iso From Here:-
http://www.mediafire.com/?zojzzda5jfc
U need to Download Ps2 Iso Files From Website
Configuration Below:
How to play PS2 games on your PC

Reset Firefox’s Forgotten Master Password Easily

Master Password is a way to add another layer of security to your locally saved usernames and passwords. Whenever you forgot your username or password for a specific account, you can check that username by going to the tools but now you have to enter the master password for gaining access to those usernames and passwords.master password firefox

Now in some cases you might forget your master password and loose control to your database, well in that case firefox officially provides a simple and easy way for resetting your master password and choosing another good password.
Remember Resetting your master password will remove all the usernames and password saved locally for security reasons.

Resetting Master Password :

1. Open Firefox and in the address bar enter the below location and press enter.
chrome://pippki/content/resetpassword.xul
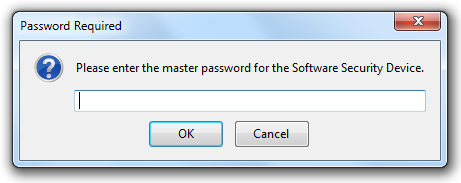
2. Now you will see the reset password page like below, no click on the reset button.
resetting master password firefox
3. That’s it now your master password will get reset and you can choose another good password.

Security of your Wi-Fi network is as much important as of your computer. All your personal information and files on your wireless network can be seen by people who are connected to your Wi-Fi network signal. This can lead to identity theft and other malicious acts.
A network security key or passphrase can help protect your wireless network from this type of unauthorized access. It’s easy to set up a secured Wi-Fi connection in Windows 7, the Set Up a Network wizard will guide you through setting up a security key.
If you already have a configured device, then go to Network and sharing center, in the left pane, click on Manage Wireless networks and then select the network for which you want to configure the security key. Click on properties and then click on Security tab and change the security key.

I don’t recommend using Wired Equivalent Privacy (WEP) as your wireless security method. Wi Fi Protected Access (WPA or WPA2) is more secure.
Difference between WEP and WPA/WPA2 encryption methods for wireless networks

Wi Fi Protected Access (WPA and WPA2)

WPA and WPA2 require users to provide a security key to connect. Once the key has been validated, all data sent between the computer or device and the access point is encrypted.There are two types of WPA authentication: WPA and WPA2. WPA2 is the most secure. In WPA-Personal and WPA2-Personal, each user is given the same passphrase. This is the recommended mode for home networks. WPA-Enterprise and WPA2-Enterprise are designed to be used with an 802.1x authentication server that distributes different keys to each user. This mode is primarily used in work networks.

Wired Equivalent Privacy (WEP)

WEP is an older network security method that’s still available to support older devices, but it’s no longer recommended. When you enable WEP, you set up a network security key. This key encrypts the information that one computer sends to another computer across your network. However, WEP security is relatively easy to crack.
There are two kinds of WEP: open system authentication and shared key authentication.
Neither is very secure, but shared key authentication is the least secure of the two. But a hacker can easily hacks it using some Wireless network analysis tool.
For this reason, Windows 7 doesn’t support automatically setting up a network using WEP shared key authentication.
If, despite these warnings, you still want to use WEP shared key authentication, you can do so by following these steps:
To manually create a network profile using WEP shared key authentication
  1. Click on Network icon in Notification area and click on open Network and Sharing Center.
  2. Click Set up a new connection or network.
  3. Click Manually connect to a wireless network, and then click Next. 28 Jul 11 12 11 16 PM 600x381 Type of Wireless Network Security keys and how to secure them in Windows 7
  4. On the Enter information for the wireless network you want to add page, under Security type, select WEP. 
  5. Complete the rest of the page, and then click Next.
  6. Click Change connection settings.
  7. Click the Security tab, and then, under Security type, click Shared. 
  8. Click OK, and then click Close.

Find out who is using your wireless network

Do you suspect that someone is wrongfully using your wireless network connection? Maybe your wireless connection is slow these days and you suspect that someone has hacked into it. Well, there are several free tools available which can help you detect who is using your connection illegally. I am covering two tools here, but if you know of any more, please do share below in the comments.
network watcher 400x150 How to find out who is using your wireless network
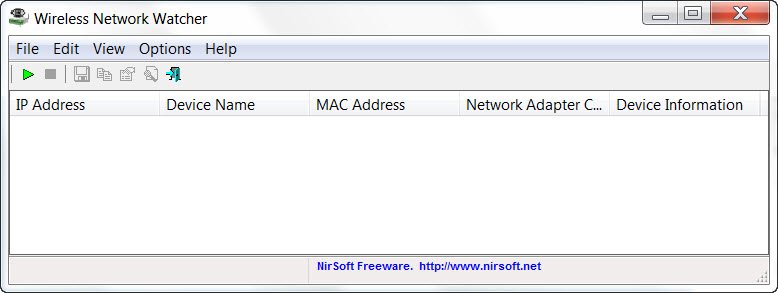
Wireless Network Watcher is the 3rd new tool released by Nirsoft, this month. It is a small utility that scans your wireless network and displays the list of all computers and devices that are currently connected to your network.
It will display the following information for each connection:
  1. IP address
  2. MAC address
  3. Manufacturer of the network card
  4. Computer name
  5. Device Name.
The tool also allows you to export the list of connected devices and save it as an html,xml, csv or a text file.
Another utility for sniffing if someone else is using your wireless network is Zamzom.

Zamzom Wireless Network Tool lets you see all  the users that are using your wireless network. There are two scan options but only the Fast Scan is available in the free version, but that should be good enough for most, I suppose. Once the scan is completed, it displays the IP address and MAC address.

Difference Between Hardware Firewall & Software Firewall

Most of the computer users are familiar with the term Firewall. Firewalls are Hardware or Software programs that monitor incoming and outgoing connections analyzing the packet data for malicious behavior.  Like the definition says, there are both Software and Hardware Firewall. In this modern age, we are literally at war with hackers and malware and virus developers, all the time and data security has become the number one concern.  To protect our computers, we use security software like AntiVirus and Firewalls – and as we just mentioned, there are two kinds of firewalls – Hardware firewalls and Software firewalls.

Hardware firewall vs Software firewall

In this article we’ll talk about difference between Software Firewall & Hardware Firewall.
computer security thumb Difference Between Hardware Firewall & Software Firewall

Hardware Firewall

Hardware Firewalls are mostly seen in broadband modems, and is the first line of defense, using Packet Filtering. Before an Internet packet reaches your PC, the Hardware Firewall will monitor the packets and check where it comes from. It also checks if the IP address or header can be trusted. After these checks, the packet then reaches your PC. It blocks any links that contains malicious behavior based on the current Firewall setup in the device. Hardware Firewall usually do not need a lot of configuration. Most of the rules are built-in and predefined and based on these in-built rules, the Packet Filtering is done.
O178201093014 thumb Difference Between Hardware Firewall & Software Firewall
Todays technology has improved so much that it not just the traditional Packet Filtering which is carried out. The Hardware Firewall has built-in IPS / IPDS (Intrusion Prevention Systems), that earlier used to be a separate device. But now these are included, offering us greater protection.
When an IPDS detects a malicious activity it sends and signal and reset the connection and block the IP address. It uses signature-based, statistical anomaly-based, and stateful protocol analysis.  You can read more about this here. But the main drawback I find, is that it allows all the outgoing packets i.e. if by chance, a malware got into your system and started transmitting data, it would be allowed unless the user became aware of it, and decided to stop it. But in most cases, this does not happen.
Hardware Firewall are typically good for small or medium business owners, with 5 or more PC or a co-operate environment. The main reason is that it then becomes cost-effective, because if your to purchase Internet Security/Firewall software licenses for 10 to 50 copies, and that too on an annual subscription basis, it will cost a lot of money and deployment could also be an issue. The users will have better control over the environment. If the user is not tech savvy and if they choose to inadvertently allow a connection that has Malware behavior, it could ruin the entire network and put the company in risk with data security. A hardware firewall could thus be very useful in such cases.

There are always few things you have to consider before buying a Hardware based firewall. The number of users in your network, number of VPN users in your network, because under-estimating the number could exhaust the performance of your device and affect the performance of the Internet connection as well. Also make sure you have enough license for VPN client connection, and it has SSL, PPTP, etc. connection support too. Even if you have to pay a subscription, go for it – because subscription means, you get the latest definitions.
Manufactures are now including Gateway Antivirus, Malware scanners and Content Filters, so you’ll get maximum protection with them. For example CISCO Hardware includes  “Cisco ProtectLink Security Solutions” on selected devices. It addresses a specific security threat, and as part of an overall security approach, provides layers of protection against different threats.
There are a lot of companies you can choose from like CISCO, SonicWall, Netgear, ProSafe, D-Link etc. Make sure you either have a certified network professional with you while setting up or a good tech support, because trust me you’ll need them when you configure the system.

Software Firewall

Now that we know how Hardware Firewalls work, I’ll talk a bit Software Firewalls.  To be honest, Software Firewalls do not need a whole lot of explanation because most of us are aware of it and are already using it. Like I said in the Hardware Firewall section, if the user is not tech savvy and if they choose to allow a connection that has Malware behavior, it could ruin the entire network and put the company in risk with data security. That’s where software firewall comes into picture, as here can we block both incoming and outgoing connections and setup  trusted rules so these accidents can be avoided.  Firewall vendors constantly research in this matter and see out updates as and when required, so the chances of your computer getting compromised are slim.
network security software2 thumb Difference Between Hardware Firewall & Software Firewall
It’s a confusing job to pick a complete Internet Security solution that is just right for you. When you search in forums you can see flaming debate, where each member is defending their favorite ones. You’ll be lost in these debates ending up more confused than when you started. The rule is to set your priorities straight. Create a list of things you want. For example do you want a free Firewall solution or paid one. What features you need in your Firewall, What additional features are required, like say Antispam, Web Protection, Malware scanner, Antivirus, etc. Do you want to go in for an Internet Security Suite? Once you decide, then compare the features. I for one use Windows Firewall. The the only drawback I find it has, is that, by default, it allows all the out going connection. So I used an additional application called Windows 7 Firewall Control by Sphinx (it has been covered at that link under serial no. 5) which we can set up to block all the out going connection and also the setup rules for the ones we want, in a simple click. They have both free version and professional paid version, but Free version is more than enough. Windows Firewall Control and Windows Firewall Notifier are other two freeware you could check out.

Set up Wireless Network Connection In Windows 7

Wireless networks allow you to work independently – without the tension of plugging in long wires that not only look bad in the house, but also are a safety hazard. Since wireless signals travel in all directions and travel fast, you can use wireless network to work from your bedroom or from the porch of your home. This article explains how to set up wireless network connection in Windows 7.

Inventory Required To Set Up Wireless Network Connection

Since we are talking of a complete wireless network, we need the following items to set up wireless network connection:
  1. An operating system that supports wireless networking. Windows 7 is a good operating system that allows you to create wireless networks without any problems. If you intend to use Windows XP, make sure you have Service Pack 3. Similarly for Windows Vista, you will need Vista Service Pack 2
  2. A fast Internet connection: You can go for either a DSL or a cable broadband. In most cases, the cable or DSL router (see point 3 below) is provided by the ISP who also sets up Internet connection. Normally, the connection from wall jack (in case of DSL) and from hub (in case of cable) is wired to the router from where, wireless signals take over for communication.
  3. A wireless router: Since we need a wireless network, we will need a wireless router. Check to see if your ISP can give you one. If not, you can get wireless router from any computer market. Make sure you buy a reputed product for better results. Routers are available in different technologies. I suggest 802.11g or 802.11n for better connectivity and good signals. Routers using the mentioned technologies are more compatible with network adaptors of different companies. Make sure that you are buying a wireless router and not a wireless access points. The latter is used to expand existing wired networks and does not serve the purpose of wireless routers.
  4. Wireless Adaptors: Most computers now come with built-in wireless adaptors. They are usually towards the front of laptops and computers and carry a switch that you can turn on and off to enable and disable network connectivity. If your computer does not have one, you can buy wireless adaptors from a computer store. I suggest that you buy USB wireless adaptors as they are quick and easy to install. Also, you can use them with different computers unlike the card type adaptors that need to be installed on the motherboards. Also, when buying wireless network adaptors, make sure they match the network technology of the router you are using in the network. That is, if you are using 802.11n router, your network adaptors should also be 802.11n. This ensures better connectivity.
To check if your computer has wireless network adaptors, proceed with the following steps:
  1. Open Control Panel
  2. Double click Network And Sharing (available under Network and Internet if you are using Category view)
  3. In the left pane, click on Manage Network Adaptors
  4. If your computer has a wireless network adaptor, it will show you a network icon saying Wireless Network Connection.
Fig 1 How to know if Wireless Network Adaptor is present1 600x229 How To set up Wireless Network Connection In Windows 7
Figure 1
Setting Up Internet Connection
Most of the ISPs set up Internet connection when you take a new connection. If your ISP did not set up Internet for you, follow these steps (assumes your modem includes wireless router):
  1. Plug one end of the phone wire into the phone jack provided on the router’s back
  2. Plug the other end of phone wire into wall jack of phone connection. If you are using a splitter, connect this end of phone wire into the splitter socket that says DSL. You can then use another phone wire to connect the splitter to wall jack of phone
  3. Plug the router into electrical socket.
  4. Turn on your main computer that you will use to set up admin privileges.
  5. Open Control Panel. If it is not in the Icon view, switch to the Icon view.
  6. Click Network And Sharing Center
  7. Below View Your Active Networks, click Setup A New Connection or Network
  8. Double click Connect To Internet and follow the steps in the Wizard
Fig 2 Creating Internet Connection1 600x438 How To set up Wireless Network Connection In Windows 7
If your modem is different from wireless router, you will need to connect phone wire – one end into modem and another end into phone jack or splitter. You can then connect the modem to wireless router using a network cable. You can then follow the steps 4 to 7 mentioned above. It should look somewhat like the image below.Fig 3 Connect Wireless Router To Modem1 How To set up Wireless Network Connection In Windows 7
At this point, your main computer should be able to connect to the Internet. If it is not connecting to the Internet, the connections must be wrong. Check the Network and Sharing window in Control Panel to see if Windows 7 is able to detect the wireless network (see figure 1 above). If not, make sure the modem/router are properly connected and switched on.
Securing The Network
Assuming that the main computer is now able to connect to the Internet, we will go ahead and configure the network for security.
  1. Click the Network icon in Windows system tray
  2. Click Open Network And Sharing
  3. Click Setup A New Connection Or Network
  4. Double click Setup A New Network
  5. The wizard will walk you through a series of steps to configure your network
  6. If your router supports WPA2, the wizard will show it in the list under Security Level. Set the Security Type to AES. Type a password under Security Key and click Next
  7. Copy the security key to some safe place so that you can use it when setting up other computers in the network. You will also need it later when you wish to make changes to the network

Setting Up Other Computers On The Network

  1. Click the Network icon in the Windows System Tray
  2. Select your network (recognized by the name you provided in the wizard above)
  3. Windows will ask you for the password. Enter the password you saved in step 7 above.

Setting Up Sharing On The Network

You have to turn on sharing on all computers, including the ones having devices such as printers and scanners so that you can use them from any computer on the network. The following applies to each computer on the network
  1. Click the Network icon
  2. Click Open Network and Sharing Center
  3. Click Choose Homegroup and Sharing Options. A wizard will walk you through setting up sharing for files and devices attached to the computer.
Fig 4 Set up sharing in Windows 7 600x501 How To set up Wireless Network Connection In Windows 7
Note that you can share files by copying them into Public folder in Windows 7. The Public folder is available in C:\Users folder.
This explains how to set up wireless network connection in Windows 7. If you face any problems, we will be happy to assist. Just drop a note in the comments stating the problem and your version of Windows.


Sunday, July 22, 2012

Use a Shortcut to Local Area Network Connection Information

* Click on Start, point to Connect to, and then click Show All Connections.

* Right–click the connection you want information about, and then click Status.

* In the connection Properties dialog box, click the Support tab.

* For more information, click on the Advanced tab.

To automatically enable the status monitor each time the connection is active, in the connection Properties dialog box, select the Show icon in taskbar notification area when connected check box.

Hidden Bluetooth service in XP and Vista

It can be used as:-
1. Open the run command
2. Now type 'fsquirt' without quotes ''
3. Now just select whether you want to send or receive any file very easy

Shutdown Computer with Your Cell Phone

1. First, you need the batch files to perform the Shutdown, Hibernate etc. You can write them down yourselves

2. open your note pad

and write lik this...

c:\windows\system32\shutdown -s -f -t 00

and save it as shutdown.bat

3. Open up Microsoft Outlook. Make sure that you have already configured it for your email.Now we will need to make it so that Outlook checks your inbox about every minute (1 minute for testing time can be increased if a delayed shutdown is desired). You can do this by going to Tools: Options.

4. Then click the Mail Setup tab, and afterwards, the Send/Receive button.

5. Make sure that the Schedule an automatic send/receive every... box is checked, and set the number of minutes to 1. Now you may close all of these dialog boxes.

6. Now go to Tools: Rules and Alerts... Next click the options button in the upper right hand corner and press the Import Rules button.

7. Now select the shutdown.bat file ...whi u hv created ...

8. Now, when you send a message from your phone to your e-mail address with the subject shutdown or smsshutdown%%, your computer will shutdown.


Use of any of the Isolated or dead E-mail address or any e-mail will shutdown your computer. Enjoy..

How to Hide User Accounts from the Welcome Screen in Windows 7 and Vista

1. Click Start.
2. In the Search field, type regedit and press Enter.
3. Locate the following registry key: HKEY_LOCAL_MACHINE\Software \Microsoft\Windows\ CurrentVersion\Policies \System.
4. In the right pane, double click the DontDisplayLastName and set its value to 1.
5. Click OK to confirm.
6. Restart the computer for the change to take effect.

If the above hack doesn’t work, try this:

1. Go to your Windows registry and locate this key: HKEY_Local_Machine \SOFTWARE\Microsoft\ Windows NT\CurrentVersion\ SpecialAccounts\UserList
2. Now, right-click the UserList folder located on the left pane and from the menu, select New – DWORD (32-bit) Value
3. Name the new DWORD as the username you want to hide and click OK.
4. Restart the computer for the changes to take effect.
5. Upon restaring your computer, you should see that the account you wanted to hide won’t disappear on the welcome screen!

How to Uninstall and Remove Software in Safe Mode in Windows OS

1. Click Start
2. In the Search field, type regedit and press Enter.
3. Locate the following registry key: HKLM\ SYSTEM\CurrentControlSet\ Control\SafeBoot\ Minimal\
4. Right-click on the Mininal key and from the menu select New – Key. Now name the new key MSIService and change the value to Service by double-clicking it.
5. If you are in the Safe Mode with Network Mode, repeat the above steps for the following registry key: HKLM\ SYSTEM#92;CurrentControlSet\ Control\ SafeBoot\Network\
6. The newly created MSIService will make available the Windows Installation Service in Safe Mode. However, I want to remind you that it is necessary to turn the new service on.
7. To do it, exit regedit, click Start and in the Search field type: services.msc and press Enter.
8. From the list, locate Windows Installer. Right-click it and select Start.
9. If the procedure to turn on Windows Installer doesn’t work try this one:
10. Click Start.
11. In the search field, type cmd. Do not press Enter.
12. Right click the Command DOS icon and click the Run it as Administrator link.
13. In the command prompt, type net start msiserver.

At the end of the whole procedure do not forget to restart your computer for the changes to take effect.

how to make super hidden files or folders

1. Open a command prompt

Click Start button-> select Run -> type "cmd" ( XP )

Click Start button-> type "cmd" in the seach box ( 7 )

2. Then press Enter


3. type "cd path_of_your_file" to go to place of your file
4. then type "dir" to view content of folder

5. then type "attrib +s +h file's_name" then press Enter
6. then view again with "dir" command

Difference Between Core i3, Core i5, Core i7

Difference between Core i3, Core i5 and Core i7

Intel will stop selling Core 2 Duo and Core 2 Quad in 2010. Core is the new range of Intel processors.

Core i3:
* Entry level processor.
* 2-4 Cores
* 4 Threads
* Hyper-Threading (efficient use of processor resources)
* 3-4 MB Catche
* 32 nm Silicon (less heat and energy)

Core i5:
* Mid range processor.
* 2-4 Cores
* 4 Threads
* Turbo Mode (turn off core if not used)
* Hyper-Threading (efficient use of processor resources)
* 3-8 MB Catche
* 32-45 nm Silicon (less heat and energy)


Core i7:
* High end processor.
* 4 Cores
* 8 Threads
* Turbo Mode (turn off core if not used)
* Hyper-Threading (efficient use of processor resources)
* 4-8 MB Catche
* 32-45 nm Silicon (less heat and energy)